Making own bread is a good option to get healthy bread for own consumption. However, when you see your bread maker's kneading blade is not rotating when you press start button, you might think that it is time to get a replacement unit.
In fact, the bread maker is still usable, just need to do a minor repair. Let me show you how to repair the bread maker.
1) Open the top lid and remove it from the housing.
2) Take out the bread pan
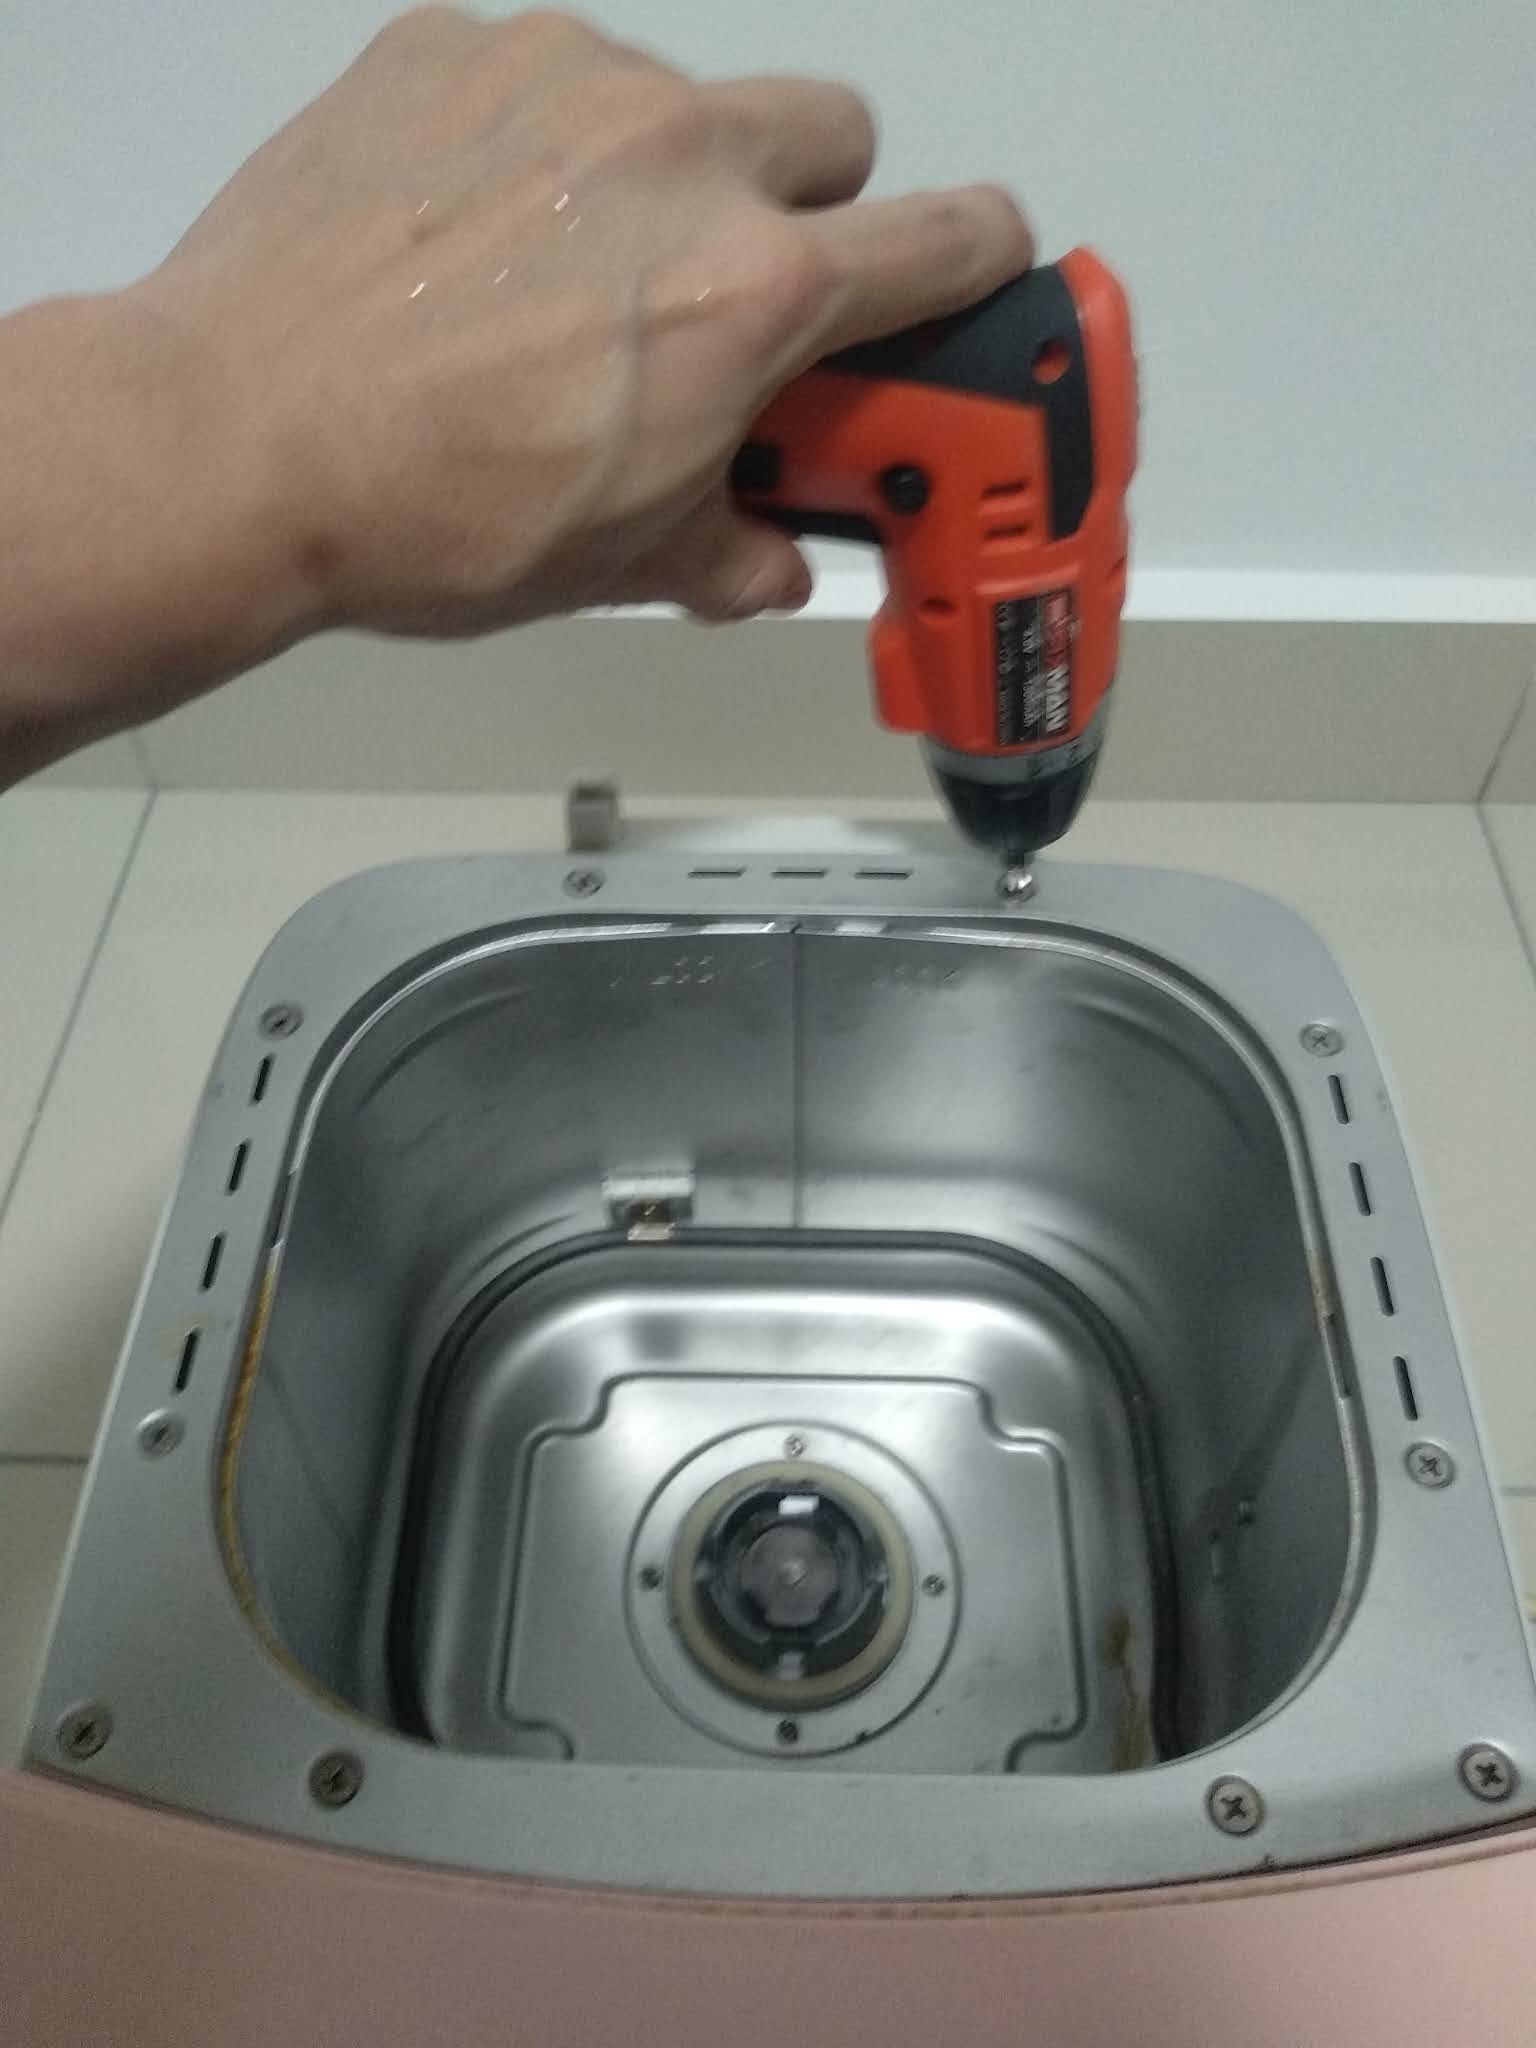
3) Unscrew all the screws (10 screws) at the outer housing top and remove the metal plate
4) Unscrew all the screws (4 screws) in the inner housing, there is a special screw (triangular shape), which you need a special type of screwdriver
5) Remove the control panel and disconnect it from the main power board
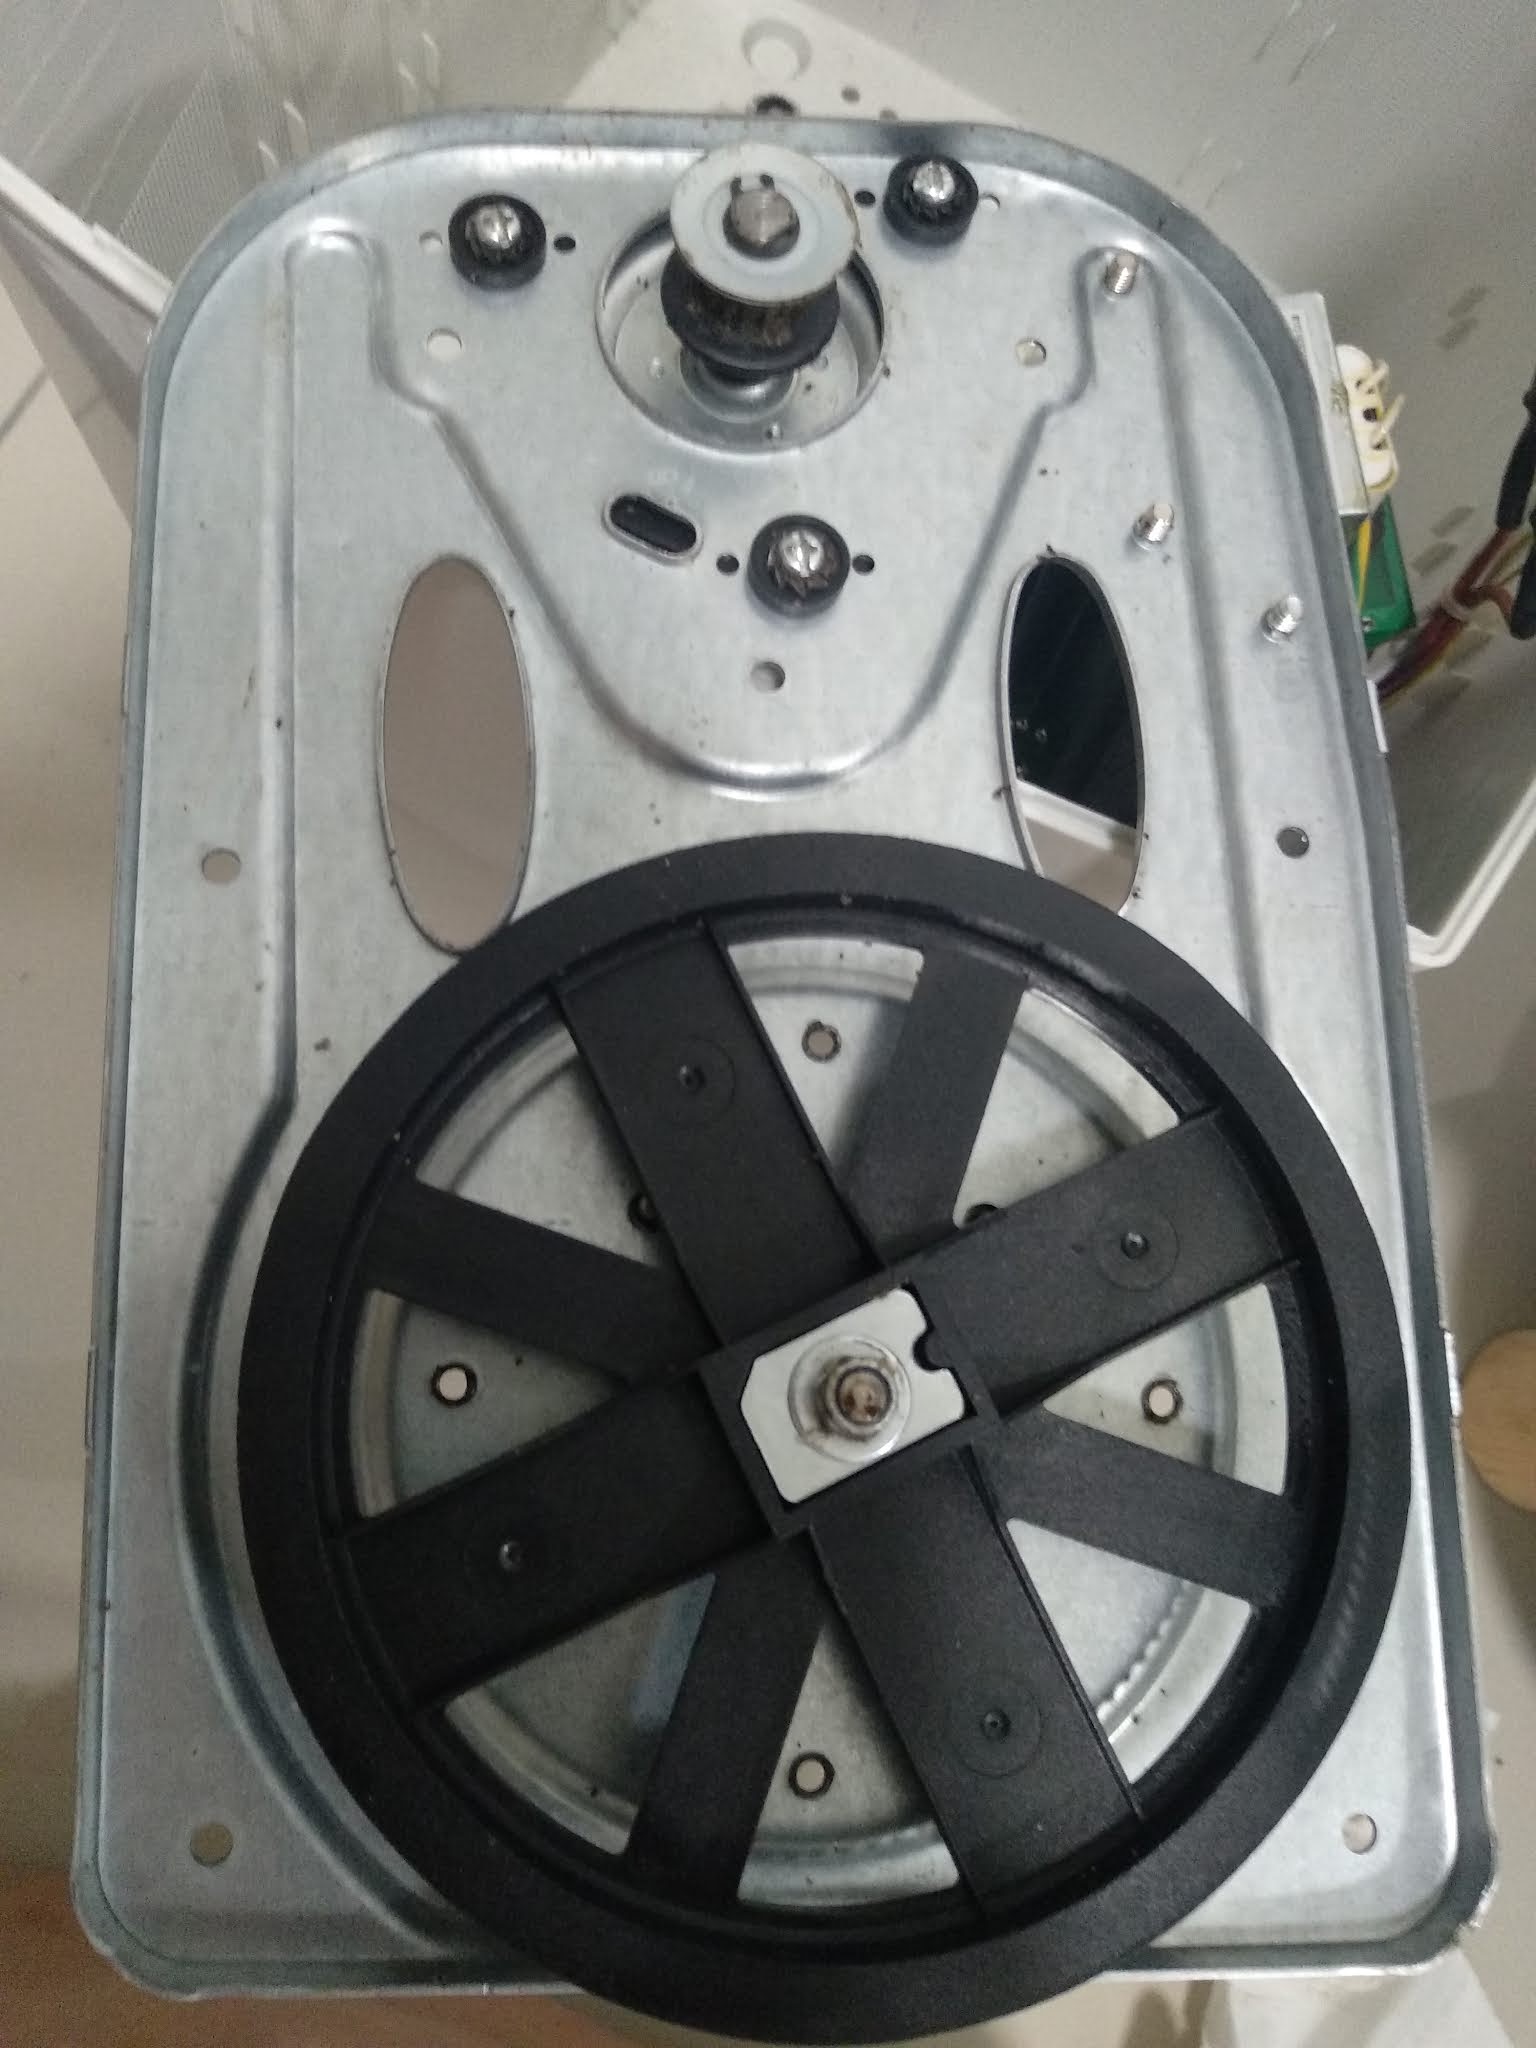
6) Now you can take out the inner housing and hang it beside with something to support it. Unscrew all the screws (7 screws) at the bottom plate which is the base for the motor and kneading rod.
7) Then, clean the dirt (mainly the debris from the rubber belt) at the bottom of outer housing
8) Flip over the bottom plate and you will see the old rubber belt is no longer exist. Only remain the debris and also a bunch of strings stuck at the kneading rod
9) Clean the kneading rod and the gear at the bottom of motor, removed the strings
10) Put a new rubber belt to tie it onto the gear and the kneading rod
11) Place the bottom plate back to its location and screw it
12) Connect the control panel back to the main power board
13) Put back the inner housing and screw it
14) Place the control panel back to its location
15) Screw back the inner housing
16) Screw back the metal plate at the outer housing top
17) Now your bread maker should be working again
It is so simple. Just need to buy a correct size rubber belt from online platform (Shopee, Lazada, etc), which cost you below RM20.
Tools: