Monday, May 06, 2024

Travel by Train (ETS) - Butterworth to KL Sentral

Travel by Train (ETS) - Butterworth to KL Sentral / KL Sentral to Butterworth

The following info were taken from other online sources, with my own inputs added as final compilation, just to keep a copy here for future reference.

Electric Train Service (ETS) Train Service

ETS train upgrades in 2022 and new train sets facilitate 6 dedicated services daily, in each direction (Butterworth - KL Sentral), which is currently (May 2024) follow this timetable:

The journey takes a little over 4 hours. In my personal experience, it keeps to the time as per the schedule. This is the full ETS Schedule (as of May 2024).

ETS Train Naming

  • ETS Types
    • EPxxxx: ETS Platinum
    • EGxxxx: ETS Gold
    • ESxxxx: ETS Silver
  • ETS Route
    • Ex90xx: ETS (Ipoh - KL Sentral)
    • Ex91xx: ETS (Butterworth - KL Sentral)
    • Ex92xx: ETS (Padang Besar - KL Sentral)
    • Ex93xx: ETS (Butterworth - Gemas)
    • Ex94xx: ETS (Padang Besar - Gemas)

Selecting Your Seat

The trains have 6 coaches with a driver cab at either end. Coach A generally leads when travelling South, Coach F has the driver when heading North. Confirm this as you approach the train, there will be a sign pointing to the direction of the carriages.

Choose the correct direction for your seating will gives you a more comfortable journey via ETS. I will normally choose the forward direction AND according to the sun direction during the whole journey (to avoid direct sunlight via the window). Besides, I personally preferred Window Seat than Aisle Seat.


Comparison of ETS (Old) vs ETS2 (New) Seating 

There are some changes on the ETS2 (New) seating arrangement. Please take note.
Anyhow, you are able to see the actual seating arrangement when you are login in online to buy the ticket.


Onboard Facilities

You may refer to this link for onboard facilities. I normally will use the Power Outlet (for phone charging), washroom and F&B Bistro (occasionally).

Buying Tickets

You can choose to buy via following channels:

How to Book Online & Choose Your Seat

  • Login to https://online.ktmb.com.my or use KTMB Mobile App.
  • Input Origin / Destination / Departure Date / Pax.
  • Click "Search" to proceed.
  • Choose your Target Train of the selected date. [ Example: Platinum - 9173 ]
  • Click "Pick Seats" to proceed.
  • Select the Target Coach of the selected train. [ Example: Coach D ]
  • You may choose "W" (Window Seat) or "A" (Aisle Seat). 
  • Select the Target Seat of the selected coach. [ Example: 7A ]
  • Seat 7A is facing forward and it is a Window Seat.
  • The fare amount will be displayed, you may proceed to "Confirm Seats".
  • Click "Proceed to Passenger Details" 
  • Fill in the required info of the passenger. Click "Proceed to Payment".
  • You will be asked to choose Takaful Plan (Basic or Premium Plan) or "No Thanks".
  • Proceed for payment and you will be provided ETS Ticket with QR Code
  • Payment Methods: KTM Wallet / Credit Card / Debit Card / e-Wallet
  • Additional Notes:
    • W: Window Seat
    • A: Aisle Seat
    • F: Female Passenger
    • M: Male Passenger
    • Forward Facing Seat: Seats with "U", e.g.: 6A, 6B, 6C, 6D
    • Backward Facing Seat: Seats with "U" upside down, e.g.: 8A, 8B, 8C, 8D
    • Selected Seat: Seat with tick / green colour, e.g.: 7A
    • Unavailable Seat: Seat with "X" (disabled for selection).
ETS Ticket with QR Code (Example)

You may use KTMB Mobile App to scan QR at ACG (Automated Control Gate) or show to the conductor during boarding.


DIY Series 61: Fixing Elba Oven That Causing Power Trip

Elba Oven (Model: EEO-H3616) Power Trip

Symptoms:

  • Power Trip when power on with Lower Heating Element Mode.
  • Suspect heating element is shorted (caused by moisture) due to oven not in use for long period of time 

Findings:

  • Checked the power line (at power plug), no short circuit at N (Neutral) / L (Live) / E (Earth or GND)
  • Checked the heating element, detected inner and outer layer of heating element are shorted

Video:

  1. Elba Oven is working fine after fixing done

Photos:

  1. Elba Oven (Model: EEO-H3616)
  2. Wiring diagram of 3-pin plug
  3. Checking connectivity of 3-pin plug (unplug oven from power point)
  4. Dismantle the metal housing and rubber stand from the oven
  5. Checking connectivity of the heating element (lower heating element detected shorted between inner and outer layer)
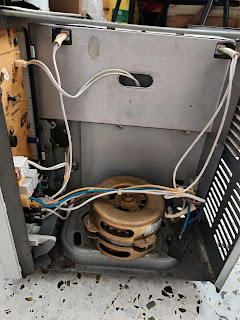
  6. Disconnect GND terminal, power ON and run the oven for 30min at 250C (1st Round: Lower, 2nd Round: Upper + Lower). This test is to prevent Power Trip during power on for repair process. The heating element expected to be back to normal after 30min on high temperature operation, to clear any short circuit due to humidity issue.

  • After testing done, power OFF and reconnect back the GND on the 3-pin plug.
  • Wait for the oven to cool down and turn ON again for normal operation check.


Tools required:

  • Screwdriver, multimeter, glove (the metal housing's edge is very sharp)

Cost involved:

  • NIL
Recommendation:
  • If the oven is expected not in use for long period of time, try to turn on it once a month just to heat up it without anything inside, to prevent short circuit of heating elements.
Tubular Heating Element [Source: Wikipedia]:
  • Tubular or sheathed elements normally comprise a fine coil of resistance wire surrounded by an electrical insulator and a metallic tube-shaped sheath or casing. 
  • Insulation is typically a magnesium oxide powder, and the sheath is normally constructed of a copper or steel alloy. 
  • To keep moisture out of the hygroscopic insulator, the ends are equipped with beads of insulating material such as ceramic or silicone rubber, or a combination of both. 
  • The tube is drawn through a die to compress the powder and maximize heat transmission. 
  • These can be a straight rod (as in toaster ovens) or bent to a shape to span an area to be heated (such as in electric stoves, ovens, and coffee makers).


Thursday, May 02, 2024

DIY Series 60: Repair Noxxa Breadmaker Oven (Model: BM315SC)

Noxxa Breadmaker Oven (Model: BM315SC)


Symptoms:

  • Upper heating (front side) element not working
  • Sometimes 3 times beep sound (Error) after Power ON 

Findings:

  • Upper heating element (front side) broken 
  • Door latch mechanism loosen, door close detection not working

Photos:

  1. Noxxa Breadmaker Oven (Model: BM315SC)
  2. After remove the top metal housing. There are 2 special security screws at the bottom of the metal housing.
  3. Remove the Main PCB from front panel
  4. Found a dead lizard between front panel and Main PCB. No damage to any functionality.
  5. Remove the top cover, the upper heating element was broken, reconnect it with overlapping a small portion of it to make it connected again
  6. Unscrew 4 screws, take out the metal plate, adjust (push to slightly lower) the door latch mechanism so that it can contact the plate just right under it.
  7. Security screws (flanged button head screws). I changed it to normal screws after removed it.


Tools required:

  • Screwdriver, plier (to unscrew 2 security screws at the bottom of the metal housing), multimeter

Cost involved:

  • NIL

Tuesday, April 09, 2024

DIY Series 59: Rowenta Artik (VU9010) Tower Fan Unable To Rotate

Rowenta Artik (VU9010) Tower Fan Unable To Rotate

Symptoms:

  • Unable to operate after Power ON
  • The power will be cut-off immediately after Power ON 

Findings:

  • X2 Capacitor (MEX/TENTA 1uF 275VAC) malfunction 

Photos:

  1. Unscrew the top left on the housing
  2. Unscrew the top right on the housing
  3. Unscrew the bottom left on the housing
  4. Unscrew the bottom right on the housing
  5. Special screws (Security Torx Head) are use on the housing as shown
  6. Unlatch the bottom side (2 latches) from the back housing using screwdriver and dismantle it
  7. Unscrew 1 screw (inside the tower) and unlatch the bottom side (2 latches) from front housing and dismantle it
  8. Tower Fan after removing the housing
  9. Unscrew a screw to remove the Control Panel
  10. Remove the Control Panel from the tower
  11. Unscrew a screw to remove the X2 Capacitor Board from Control Panel
  12. Check the X2 Capacitor condition and spec
  13. Desolder the broken X2 Capacitor
  14. Replace a new X2 Capacitor
  15. Security Torx Head


Videos:

  1. Test the tower fan after reinstalling the Control Panel
  2. Test the tower fan after reinstalling the housing

Tools required:

  • Screwdriver, soldering tools, multimeter
  • Security Torx Head screwdriver 

Cost involved:

  • X2 Capacitor (MEX/TENTA 1uF 275VAC) = < US$1

Wednesday, March 27, 2024

DIY Series 58: Toilet Cistern Overflow Pipe Replacement

Toilet Cistern Overflow Pipe Replacement

Symptoms:

  • Water keeps flowing out from overflow outlet at the bottom of the cistern
Findings:
  • The overflow pipe having signs of cracks
Photos:
  1. Toilet Cistern (water tank)
  2. Turn anti-clockwise to remove flushing push button
  3. Open the cover to see inside the cistern
  4. Found crack on the overflow pipe
  5. Turn-off the water inlet valve & disconnect the flexible hose
  6. Identify the location of the cistern bolts (left & right)
  7. Remove the nut (left) from the bottom of the cistern
  8. Remove the nut (right) from the bottom of the cistern
  9. Keep the 2 nuts removed from the cistern
  10. Remove the cistern from the toilet bowl base
  11. Place the cistern on the floor
  12. Remove the old overflow pipe from the cistern
  13. Crack found on the old overflow pipe
  14. Replace with the new overflow pipe and assemble everything back to its original condition


Tools required:
  • Plier / Spanner
Cost involved:
  • Overflow Pipe = US$1.80