Thursday, February 27, 2025

Application Study: Basic Vacuum Cleaner Teardown

Basic Vacuum Cleaner Teardown (Akira 1600W Vacuum Cleaner)

  • Vacuum cleaner basically is a very simple and straight forward application with a motor to do the suction.
  • I received a malfunction Akira 1600W vacuum cleaner yesterday. Immediately, I did a complete teardown to study on it for the 1st time.


Teardown Observation:
  • Power supply from power plug to motor no abnormality (use test pen to check)
  • Soft Start PCB Board (Speed-Control) looks normal
  • ON/OFF switch working normally (use test pen to check)
  • Suspect motor (YDC04-14 1400W by Ningbo DeChang) malfunction, burnt marks found inside the motor with burning smell


Test the AC Motor with Multimeter:
  • Ensure the multimeter is in the OHM setting. Next, touch probes to the two motor terminals. 
  • An infinite multimeter reading indicates an open circuit, meaning the motor is faulty. 
  • A zero reading signifies a short circuit and the motor is faulty.
  • If the multimeter reading falls between zero and infinite, your fan motor is working properly.
Findings: 
  • The motor is having open circuit; thus, it is broken. (use multimeter to test)
Example of Motor Wiring Diagram:
  • Only 2 wires connection (Live & Neutral), no GND wiring.
  • Consists of an ON/OFF switch, Soft Start Board (Speed-Control), and a motor (AC 240V)
  • Temperature sensor might be built-in inside the motor.
Tools:
  • Test Pen, Multimeter, Screwdriver
Notes:
  • Akira Vacuum Cleaner clearly stated 1600W on its surface, but it is using a 1400W motor?
  • New OEM motor (1400W) is about MYR$60 to MYR$80, and a new vacuum cleaner is only slightly above MYR$100. Thus, it is not worth to change the motor, I recommended just buy a new set of vacuum cleaner.


Monday, February 24, 2025

Travel: Inter-Terminal Transfer between KLIA1 & KLIA2

Inter-Terminal Transfer

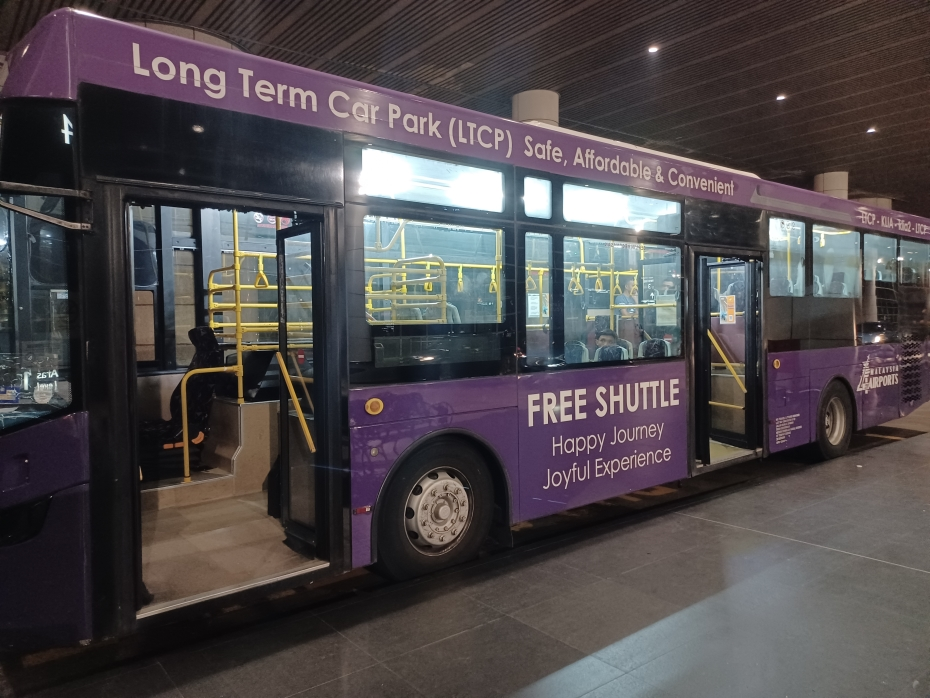
Passengers with connecting flights between KLIA1 (Terminal 1) and KLIA2 (Terminal 2) can enjoy the free round-the-clock shuttle bus transfer services between the two terminals.


Need to travel from KLIA1 to KLIA2 and vice versa? Free shuttle buses are ready for boarding at their designated pick-up points at both terminals.


The shuttle route is from Terminal 1 – Terminal 2 – Long Term Car Park (LTCP) – Terminal 1. This service is available at the frequency of every 15 minutes from all stops.

KLIA1 to KLIA2 Shuttle Bus
  • It takes around 15 minutes to go from KLIA1 to KLIA2 by shuttle bus – the journey is direct.
KLIA2 to KLIA1 Shuttle Bus
  • The shuttle bus going in the other direction from KLIA2 to KLIA1 takes 20 to 25 minutes. It takes slightly longer as the bus stops for a little while (around 5 minutes) at the Long-Term Car Park (LTCP) to pick up other passengers.
Waiting areas for the shuttle are as below:


KLIA Terminal 1 (KLIA1) Layout Plan

  • KLIA Terminal 1 comprises of three main buildings – the Main Terminal Building, the Contact Pier, and the Satellite Building.


Airlines operates at KLIA1:

KLIA Terminal 2 (KLIA2) comprises of the Main Terminal Building (MTB), Skybridge, Satellite Building, connected Piers (J / K / L / P / Q) and a Gateway@KLIA2 shopping mall with attached car park facility, plus impressive retail space of 32,000 sqm to accommodate 225 retail outlets.


Airlines operates at KLIA2:


You can also hop on the train for a speedy 4-minutes ride between KLIA1 and KLIA2 (but unlike the free shuttle bus, this is not free – it costs MYR$2).


KLIA Ekspres / KLIA Transit Ticketing Info:


Additional Info:
  • You may take KLIA Transit + MRT Putrajaya Line to go KL City Center at affordable train fare.

Tuesday, February 18, 2025

DIY Series 73: Repair Bread Maker (Trio TBM-111) Big Pulley Wheel

Please refer to the complete disassemble process in previous blog Repair Bread Maker (Trio TBM-111).

Symptoms:

  • Kneading blade / arm is not moving when the motor start running. Either rubber belt or big pulley wheel or small drive gear is broken.

This time, I am fixing the big pulley wheel, where the pulley wheel is worn-out.

Photos:

  1. Worn-out big pulley wheel
  2. Remove old wheel and install new wheel
  3. Tighten the nut of the wheel


Video:
  1. Trio TBM-111 Bread Maker is working fine after fixing the big pulley wheel

Tools:
  • Screwdriver, plier / spanner
Costs:

Monday, February 17, 2025

DIY Series 72: Yamaha Keyboard Repair - Easy Fix for Keys Not Working

It had been more than 20 years since my wife bought this Yamaha Keyboard (DGX-500). Everything was working fine except floppy disk drive (FDD) is malfunction (basically not in used all these while). We are using USB-MIDI connection for data transfer.

Recently, it was noticed that several keys are not responding, initial thought it might be aging and going to the end of its life. However, after doing some searching online, it might be possible causing by dust between PCB and the keys, which is blocking its connectivity.

Photos:

  1. Yamaha DGX-500 Electric Keyboard
  2. Identify the malfunction keys
  3. Turn the keyboard upside down to start dismantling process
  4. Unscrew all the screws at the bottom housing (dotted circle indicates more screws underneath)
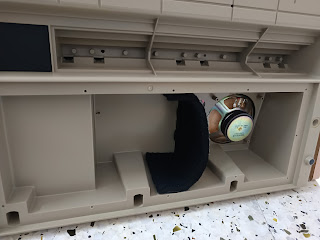
  5. Example of speaker compartment after dismantling the cover
  6. Dismantle the key part by part by unscrew the 4 screws at the top of the keys
  7. Comparison between before cleaning (left) and after cleaning (right) the dust layer
  8. Use the dry cloth or even toothbrush to help on the cleaning, with vacuum cleaner


Videos:
  1. Test all keys functionality before assembling back the complete set

Tools:
  • Screwdriver, dry cloth, toothbrush, plier, vacuum cleaner
Costs:
  • NIL
Time Spent:
  • 2.5 hours to 3.0 hours
Note:
  • Do remove & clean the mesh net of the left & right speaker and its compartment. 
  • You will need a plier to twist it in order to remove it from the housing. 
  • After cleaning the dust layer (3mm to 5mm thickness), you will feel the sound volume is much better compared to before cleaning. 


Friday, February 14, 2025

Application to Local University via UPU (Govt. Subsidized) / Alternative (Self-Funded Direct Intake)

UPUONLINE (for 2025/2026)

  • Step 1: Buy a PIN from Bank Simpanan Nasional (BSN) @ RM10.60
  • Step 2: Go to the UPUONLINE official website to register

= UM =

Admission

Saluran Perdana (UPUONLINE)

Saluran Alternatif (UM Open Channel - SATU) - Self-Funded Direct Intake


= UPM =

Admission


Saluran Perdana (UPUONLINE)


Saluran Inklusif  - Self-Funded Direct Intake


= UTM =

Admission

Saluran Perdana (UPUONLINE)

Saluran Alternatif (UTMSPACE) - Self-Funded Direct Intake


= UKM =

Admission

Saluran Perdana (UPUONLINE)

Saluran Alternatif  - Self-Funded Direct Intake


= USM =

Admission

Saluran Perdana (UPUONLINE)

Saluran Alternatif (USM +1) - Self-Funded Direct Intake


Note: 

Info compilation for my son who just completed his SPM exam (Year 2024/2025).