Thursday, April 27, 2023

Historic Structures Since 1936 (by British)

  • Giant Well
  • River on River
 
To access to these 2 locations (which is along the same river), it is quite challenging by car, as the access road is only fit for single vehicle to access and there is no way to make a turning back (not easy though) until you reach the end of the road.

For those interested, GPS location of main road to access to these 2 locations:

Giant Well ("Telaga Gergasi" in Malaysia Language)
  • The height of this giant well structure is about 100 feet or 30 meters high with a diameter of 20 feet or 6 meters.
  • The British technology originally served to move tin produce through the river, but the modern features of the construction could indirectly prevent soil erosion from settling in Bukit Merah Lake.


River on River ("Sungai Atas Sungai" in Malaysia Language)
  • "Sungai Atas Sungai" is a water canal that is diverted from Ijok River and across the Redang Panjang River which flows beneath it.
  • This bridge was built in 1936 across the canal and remains intact today.


Friday, April 21, 2023

DIY Series 35: Fixing Car Signal Switch

On this specific morning, I was exploring on how to fix the car signal switch.


There are many info available online, but it might not be 100% match to my requirement.
Thus, I had started my journey on looking into root cause of the signal switch malfunction.

1st video shows signal switch malfunction, the right-side signal light is not working.

2nd video shows signal switch already back to normal, after the fixing was done.

Photos:
1. Unscrew 2 screws at the left bottom side of the steering
2. Unscrew 2 screws at the right bottom side of the steering
3. Unscrew 2 screws at the compartment under the steering
4. Place the compartment at the car floor

5. Remove the upper casing at the steering
6. Remove the lower casing at the steering
7. There are 2 screws at the signal switch
8. Unscrew 2 screws at signal switch


9. Take out the signal switch
10. Locate and unlatch the 2 connectors
11. The 2 connectors from signal switch
12. Signal Switch Unit


13. Unscrew 4 screws at the top side of the signal switch
14. The turn signal return spring mechanism is in good condition
15. Unscrew 2 screws at the bottom of the signal switch
16. Identify all the copper contacts whether in good conditions or not


17. Found the copper plate for left / right signal was worn-out
18. Take out the copper plate for rework
19. Remove the copper plate from its holder
20. Use plyer to hold the copper plate


21. Prepare a set of soldering iron
22. Use soldering iron to touch-up the copper plate using solder
23. Copper plate after rework was done
24. Put the copper plate back to its original location

You may proceed in reverse order to re-assemble the signal switch back to its original condition.

It was tested and the signal switch is now working accordingly.

Tools required:
Screwdriver, plyer, Soldering Tools

Costs involved:
US$0 (Original new parts might costs about US$25.00, exclude labour charges)

Summary:
Repair/rework is one type of recycle activities. It is indeed reusing the old parts and hence reduce the rubbish.
[Ref]: https://blueandgreentomorrow.com/features/9-scrap-car-parts-can-reused-recycled/

Update [ 2023-10-21 ]:
After 6 months of usage, the soldered copper plate worn-out again.
I repeated the flow above to fix the copper plate, and it is working again.

Update [ 2024-10-03 ]:
After 12 months of usage, the soldered copper plate worn-out again.
I repeated the flow above to fix the copper plate, and it is working again.

Update [ 2025-05-21 ]:
After 7 months of usage, the soldered copper plate worn-out again.
I changed to a new unit while waiting for availability to fix the old unit.


Monday, April 10, 2023

DIY Series 34: Ceiling Fan Installation (Changed from Regulator Fan to Remote-Controlled Fan)

Installing new remote-controlled fan to replace old regulator fan.

Basically it is easy to have it done by self-installation, with just minor wiring modification at wall regulator to bypass its usage. 

Wiring configuration for Regulator (in-use) vs Remote-Controlled (bypass) as below:


Photos:

  1. Example of Wall Regulator (basic AC Fan).
  2. Default wiring connection for regulator under the housing.
  3. Disconnect the 2-wires from regulator and shorted it.
  4. Leave the regulator wires (not-in-use) and close the housing.
  5. Connect the new ceiling fan (remote-controlled) to these 3-wires.


Tools required:

  • Screwdriver, test pen, spanner/plyer

Costs involved:

  • Panasonic Bayu 5 (New): RM330 ~ RM400
  • Installation: DIY

Wednesday, April 05, 2023

DIY Series 33: Water Heater No Hot Water? How to fix it?

Instant Water Heater: Magnet & Reed Switch


The two contacts of a reed switch become opposite magnetic poles, which is why they attract and snap together. It doesn’t matter which end of the magnet you bring closer: the contacts still polarize in opposite ways and attract each other.

When you take the magnet away, the contacts separate and return back to their original position.

How to fix your Water Heater?

If your home water heater is not supplying hot water, it might be caused by one of the followings:
  1. Faulty Magnet or/and Reed Switch
  2. Faulty Heating Element
  3. Faulty Thermostat
  4. Blown Fuse
I would like to share specifically on Item (1), where the magnet is broken/malfunction, however the Reed Switch is still working fine.

Video:
  • 1st part of the video shows the magnet is away from the Reed Switch or broken, "Heater" LED is OFF, thus the water heater is NOT working. 
  • 2nd part of the video shows the magnet (good condition) is purposely pushed to be near to Reed Switch, "Heater" LED is ON, thus the water heater is working.

Photos:
  • 1st Photo: You can refer to [Before] & [After] fixing with the new flow sensor magnet.
  • 2nd Photo: Refer to this photo for procedures to remove the broken magnet.
  • 3rd Photo: Refer to this photo for procedures to insert a new magnet.
  • 4th Photo: Refer to this photo if you need to change a new Reed Switch.


Tools required:
  • Screwdriver, plyer, screw (to remove the stopper in order to take out the magnet)

Costs involved: 
  • Magnet = US$2.20 (roughly) 
  • Reed Switch = US$1.10 (roughly)

[ Pensonic PWH-800E ]

Same flow sensor (magnet) is used by Pensonic PWH-800E. Thus, you can follow the same DIY steps to do the fixing.

Photos:
  1. Pensonic PWH-800E
  2. Use a screw and plier to remove the stopper
  3. Replace the broke flow sensor (magnet) with a new one
  4. New flow sensor (magnet)


[ Rubine RWH-2838EP-PT ] - Updated on 2024-10-08

Same flow sensor (magnet) is used by Rubine RWH-2838EP-PT. Thus, you can follow the same DIY steps to do the fixing.

Photos:
  1. Rubine RWH-2838EP-PT
  2. Use a screw and plier to remove the stopper, replace with new magnet (flow sensor)


Tuesday, March 28, 2023

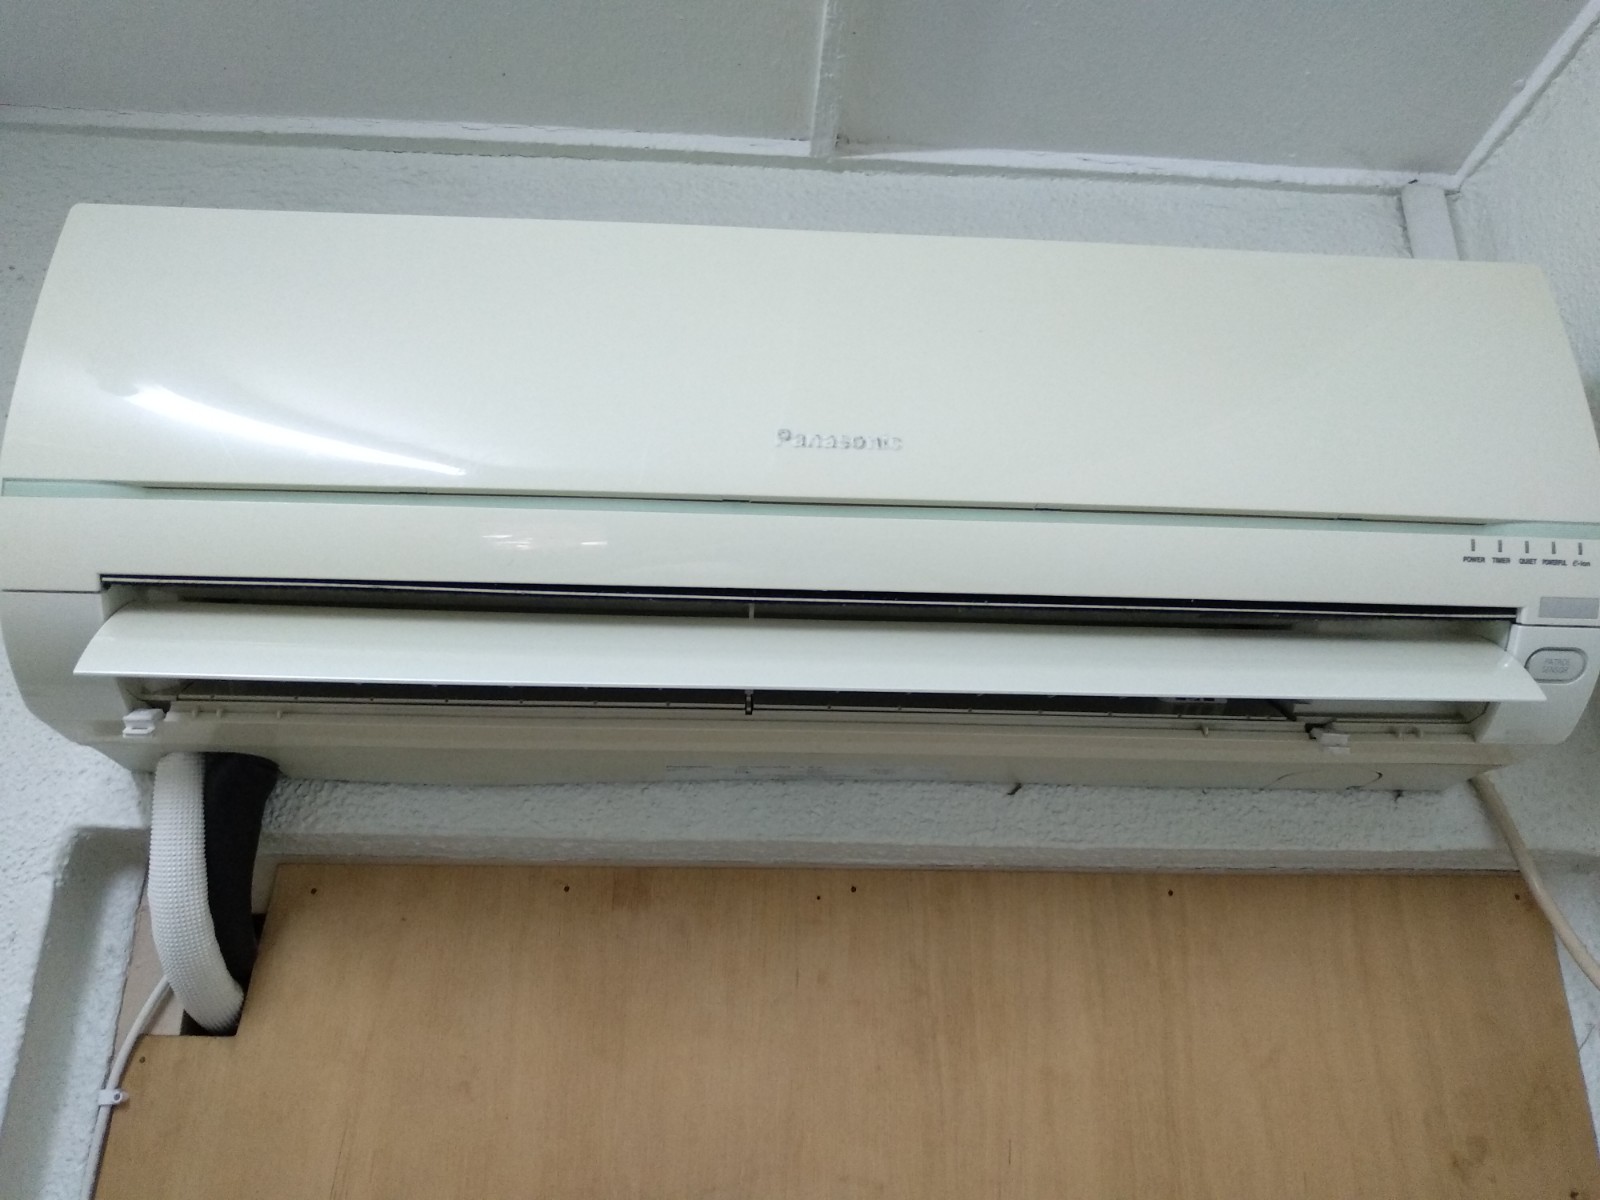
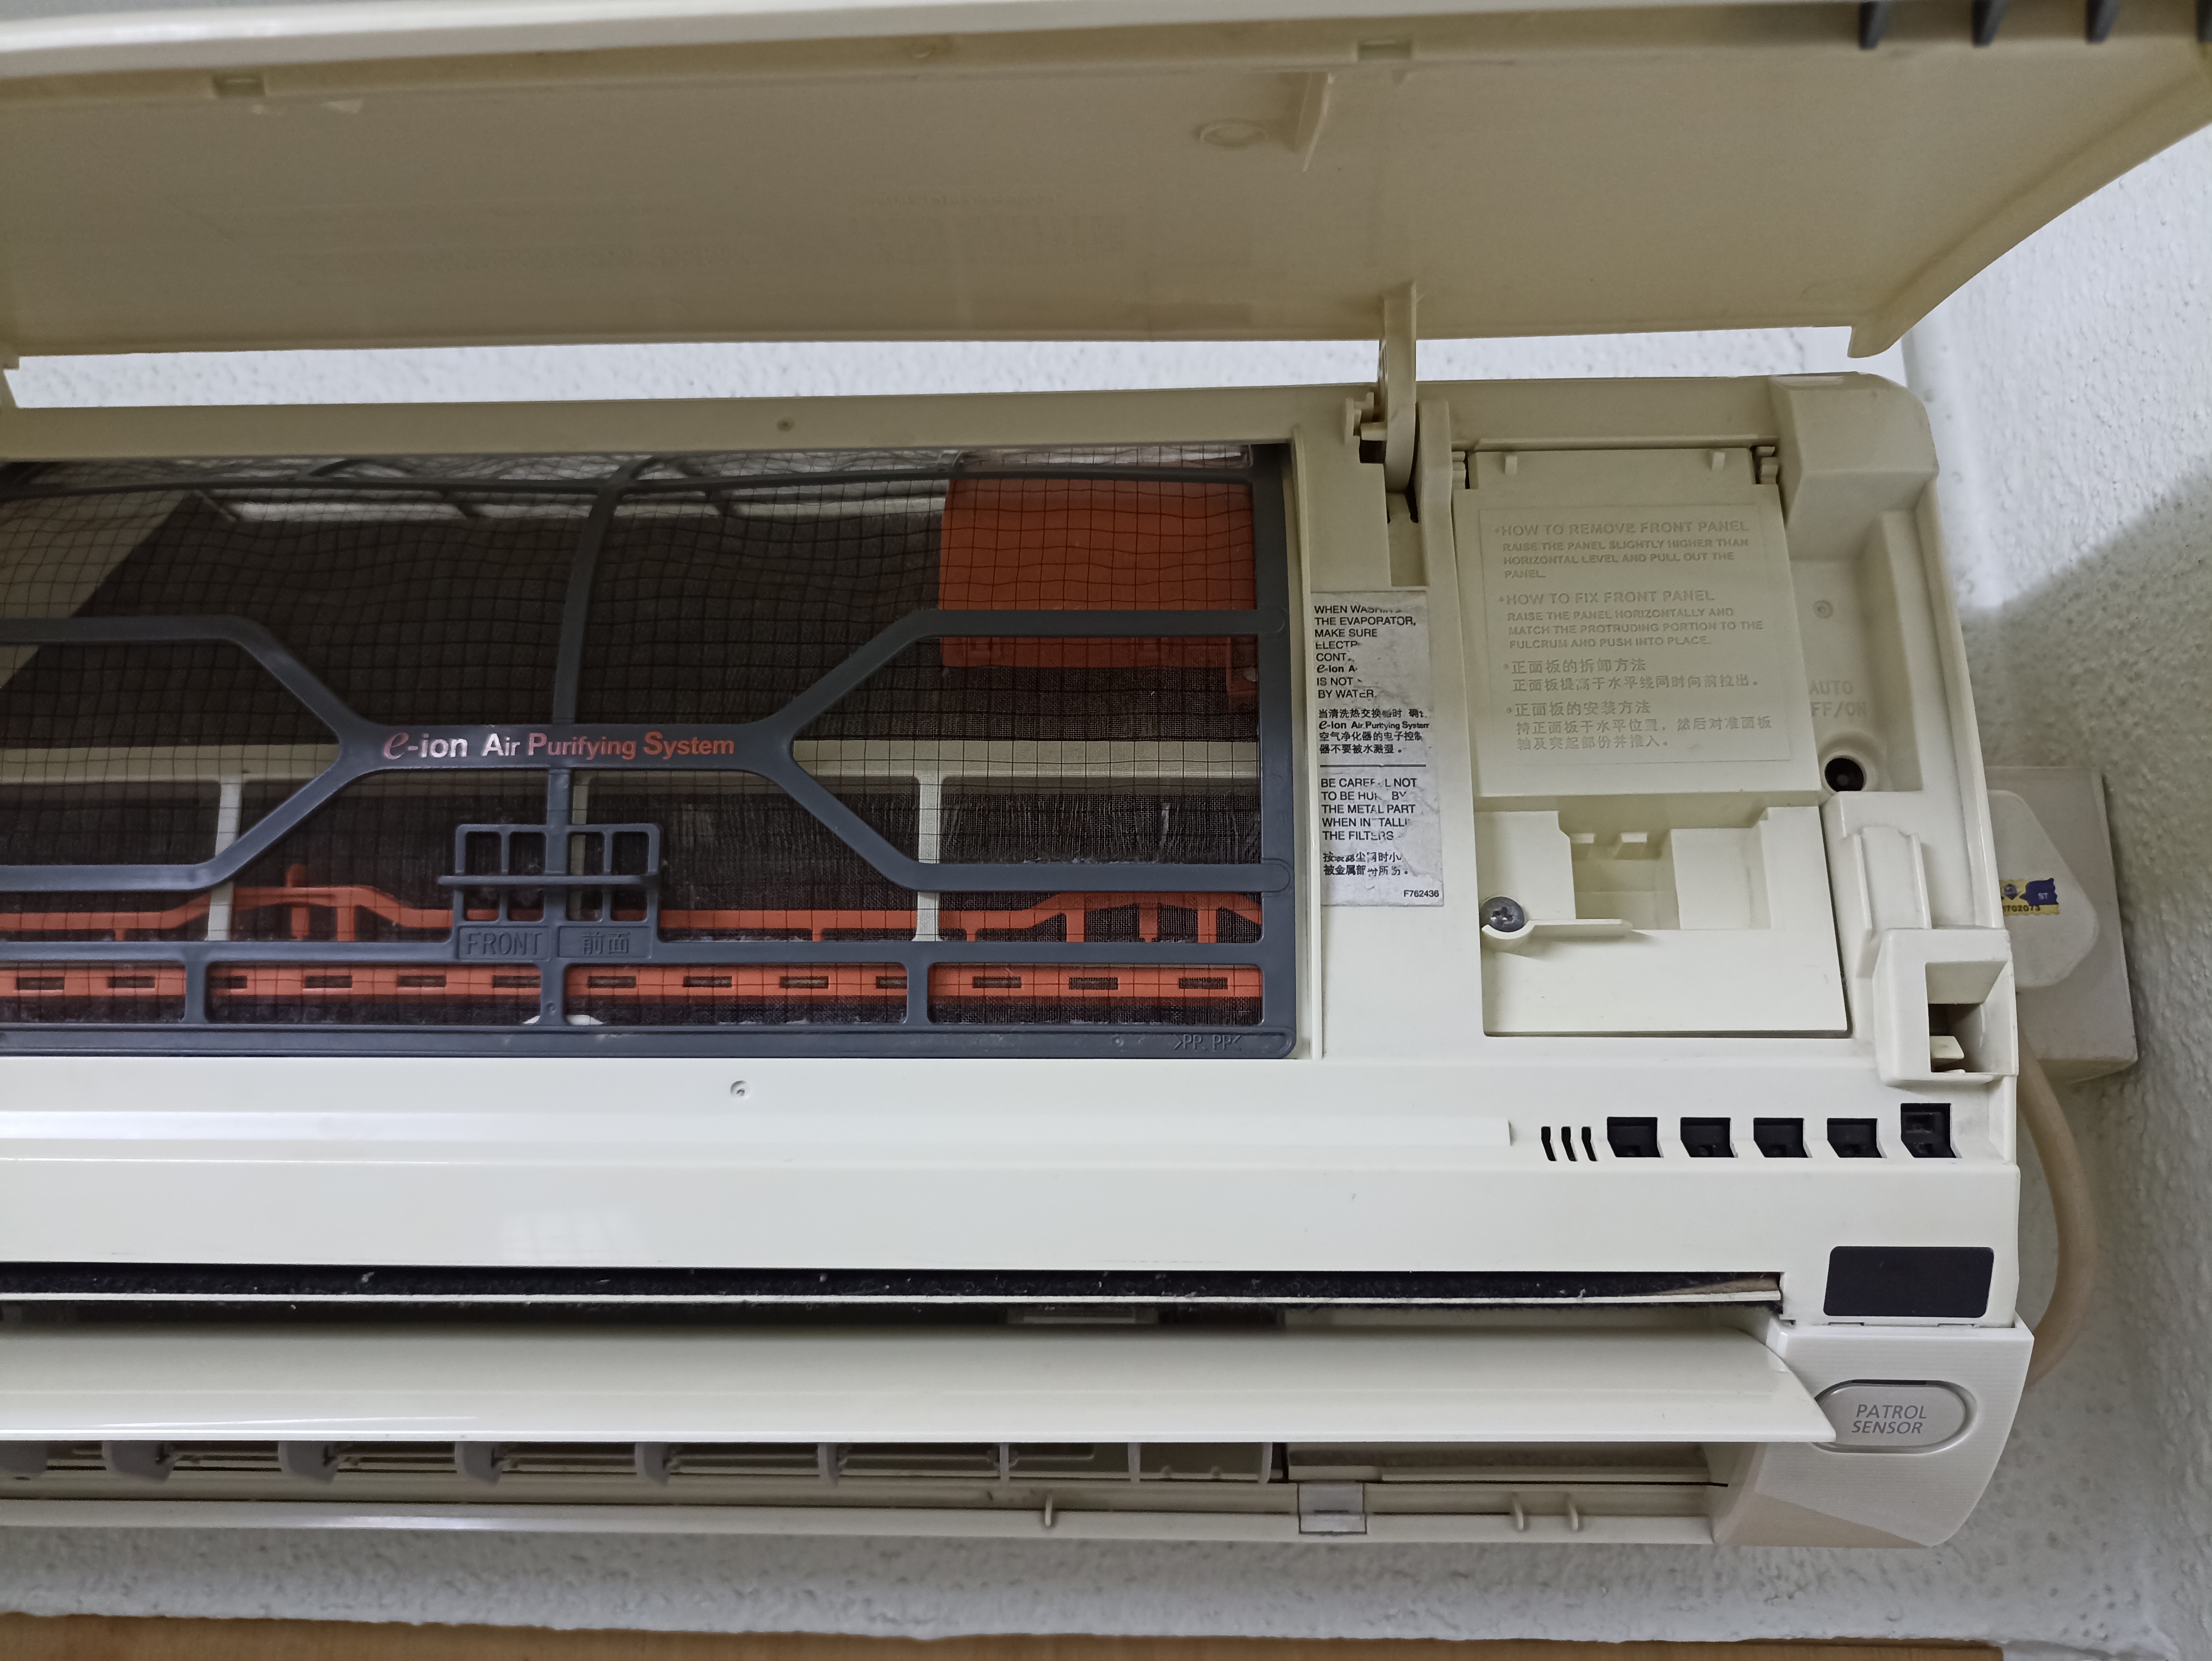
DIY Series 32: Fixing Panasonic 1HP Aircond Louvre / Swing Motor


Panasonic 1HP Aircond Louvre / Swing Motor DIY Replacement


When your aircond unit is getting aging, most likely you will be facing such issue where the louvre is not able to open up to max, or not even halfway (and auto-swing is not working). This will definitely limiting the cold air flow to flow to a distance away.

This problem is normally caused by malfunction of louvre motor. For Panasonic 1HP aircond, it is very easy to source online for the replacement parts. Just look for the one labelled as "28BYJ46" 12V DC Motor. It might cost you RM15 (for OEM) to RM30 or even more (for original parts). Examples shown as below, I am using "Tokayp" brand bought from Lazada this time.


You do not need special tools to dismantle the aircond front grille, just a screwdriver will do. Of course, you will need some basic know-how on how to do proper dismantle and re-assemble the cover and parts.

1) Remember to power OFF the aircond before start any activities.


2) Lift open the vertical vane gently


3) Remove the 2 caps and 2 screws at the bottom of the discharge vane


4) Hold both sides of the front grille and remove it by pulling up and toward yourself gently


5) Take out the front grille from indoor unit


6) You can find the louvre motor located at the right side


7) Identify and detach the connector from the main board, unscrew the louvre motor and remove it from its location


8) Get the new louvre motor and screw it onto the same location as replacement.


9) Power ON and test its functionality, then re-assemble the front grille back according to reverse order.


10) After completed re-assemble process, you may now switch ON the aircond and the louvre motor will operate as desired.


Wednesday, January 04, 2023

Tools Series #1: HOME DIY USING BLACK & DECKER POWER TOOL 550W (KR554REKP20-B1)

I had been doing DIY projects for household related installation / projects for many years. One of the most important tools needed is a suitable and yet affordable power drill. All these whiles, I am using Black+Decker KR554REKP20-B1 550-Watt 13mm Hammer Drill. I had been using it for many years since then, it serves its purpose perfectly. 


Brand: Black & Decker
Model: KR554REKP20-B1 550-Watt 13mm Hammer Drill 

Specifications:
  • Power: 550-Watt
  • Chuck Capacity: 13mm
  • Impact Rate: 0 - 47,600 BPM
  • Speed: 0 - 2,800 RPM
  • Max Drilling Capacity: Wood - 20 mm, Steel - 13 mm, Masonry: 13 mm
  • Cable: 2m 
  • Remark: Suitable for home drilling

Features: 
  1. Drilling / Hammering mode provides the power and speed to drill into masonry, steel and wood
  2. Variable speed for ultimate finger tip control for all drilling applications
  3. Reverse Brush System for full torque and power in forward and reverse
  4. Lock on button for continuous use
  5. To use the power drill effectively, it is necessary to choose the correct drill bits. There are different types for different purposes.

  • Masonry Bits
  • Tiles Bits
  • Woods Bits
  • Multipurpose Bits
    Most of the time, I will choose multipurpose bits (6mm, most commonly used) to cover both tiles and masonry (cement) drilling, on "Hammer Mode" of power tools.

    Among the DIY projects involved drilling as listed below:

  • Fabricate Plywood Water Filter Wrench 
         https://gr8place2go.blogspot.com/2021/01/diy-series-2-mco.html

  • Household Water Heater Installation
         https://gr8place2go.blogspot.com/2021/07/diy-series-7-mco.html

  • Wall Mounted Foldable Table
         
    https://gr8place2go.blogspot.com/2022/04/diy-series-26-wall-mounted-foldable.html

  • Installation of Home Surveillance PTZ Security Camera
         https://gr8place2go.blogspot.com/2022/11/diy-series-30-installation-of-home.html

    and many more to be shared in near future.
       
  • Wednesday, November 30, 2022

    DIY Series 31: Easy Installation of Kinetic Wireless Battery-Free Doorbell

    Thinking of installing a new door bell, but there is no wiring available? or the existing door bell spoilt and looking for replacement?

    Here is the solution. Battery-free wireless doorbell requires no battery and no wiring. It is totally hassle free, easy to install, and maintenance free.

    It uses a unique technology for energy harvesting with ultra-low-power wireless technology (pending for worldwide patents). 

    When users press the bell button, energy converting module inside will change the mechanical energy into electric energy. Then the wireless module of the button sends the signals to receiver. The receiver receives the signals and plays music / react accordingly. 

    Advantage of Kinetic Battery-Free Doorbell

    1. Battery-free bell button (use kinetic energy)
    2. No wire (wireless transmission)
    3. Long working range (100m to 150m)
    4. Multiple melodies and sound levels (on your choice)
    5. Easy installation (hassle free)
    6. Waterproof and anti-sunshine (worry free)

    Users are freely to configure it in various combination, according to the actual needs. You may pair multiple chimes to a single button (Type 1), or multiple buttons pair to a single chime (Type 2).

    Type 1: Add chimes, no limit to the number of chimes. Just add chimes as needed. 
    Type 2: Add buttons, maximum of 3 buttons can be learned to a single chime.


    There are 2 models commonly available, E2 Model and N1 Model.
    E2: Basic unit, no memory function and no self-learning mode. Cheaper in price.
    N1: Programmable unit, with memory function and self-learning mode. Slightly higher price.


    Self-Learning Function:

    With this Self-Learning function, it is available to pair additional buttons and chimes by yourself. This is perfect for the houses with many doors or many rooms. Maximum of 3 buttons can be learnt to a single chime.

    There is no limit for the numbers of the chimes, you can add as many chimes as you want to pair with one button.

    Repeater Function:

    Each chime can be a repeater, plug in the repeater in the middle of the working range, this set of doorbell can easily reach to distance of over 200m in an open area.

    Easy Installation:

    The battery-free wireless doorbell consists of transmitter (button) and receiver (chime). Just place the transmitter at the door / gate, and plug in the receiver into any 13A power point.


    I personally had been using this Kinetic Wireless Battery-Free Doorbell for more than 3 years. Till now, my unit is still in good condition.