Xiaomi RedMi 4X Screen & Battery Replacement
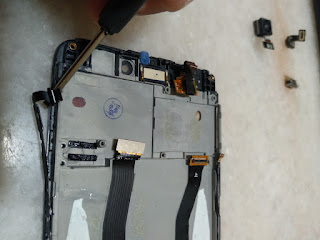
1. Always get ready the necessary tools before you can start any DIY repair. 2. This DIY step-by-step is for RedMi 4X screen replacement. The procedures might be slightly different for other models. 3. Use the pin to eject the SIM card slot. 4. Use the tool kit to dismantle the back cover of RedMi 4X. For the 1st time, it could be very tight and need more patience when dismantling. Do it patiently to prevent any unnecessarily damages. 5. Open up the back cover slowly. Disconnect the connector of finger print scanner attached at back cover. 6. The following picture shows the SIM card slot and back cover are dismantled successfully. 7. Unscrew all the 9 screws of the main board. 8. Condition after unscrewing all the screws. 9. Here are the 9 screws. 10. Remove the main board metal cover. 11. You may now disconnect the battery connector. 12. Remove the battery from the unit. If you plan only for a battery replacement, you may end it here. Once replacing with a new battery, go straight to Step 25. 13. Disconnect the LCD Screen connector from the main board. 14. Disconnect another 4 connectors. 15. Take out the main board by disconnecting another 2 connectors at the back when you flip it over. 16. Now you may proceed to the charger board. Unscrew the 6 screws and remove the charge board cover. 17. Disconnect the 2 connectors in order to take out the charger board. 18. Now, return to the frame (top area). Take out the cameras (2 units), vibrator, the side volume / power button and the speaker.[ Note: I forgot the take out the speaker module from the old frame, so the next few photos didn't show the speaker on the new frame, but instead you need to remove it and put into the new frame together with the camera modules and side volume / power button ] 19. Get your new LCD screen with the frame ready. Placed the camera modules, vibrator, speaker, and the side volume / power button and install onto the new frame. You might need the black colour double sided tape (comes with a certain tool kit set) for the vibrator and side volume / power button. 20. Peel off the sticker at the frame for LCD screen cable and the charger board cable. 21. You are now ready to put the main board onto the new frame. First, connect the 2 connectors at the back side of the main board. 22. Place the main board nicely onto the frame and connect back the LCD screen connector. 23. Now place the charger board onto the new frame (bottom). 24. Peel off the 2 stickers for the battery. 25. Place the battery and connect it to main board. Put back the main board cover and screw all the 9 screws. You may try to power on your phone to test the new LCD screen. Power off the phone again it's done. 26. Put back the phone back cover. Insert the SIM card slot. 27. DIY for LCD screen with frame / battery replacement is done.


No comments:
Post a Comment