DIY A Kitchen Water Filter
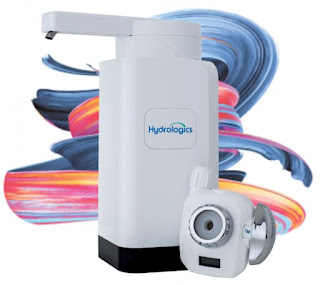
(a) Kitchen Top Filter (Hydrologics TF300)
(b) Under Sink Pre-Filter (SPUWASU X822)1) Get ready the necessary parts & PVC fittings
1.1 Male-to-Male Adaptor
1.2 PVC Elbow 1.3 Copper Base 1.4 Pipe (Choose the one on the right, thicker. I choose "PALING" brand) 1.5 Copper Extender 1.6 Mini Valve (Male to Female) 1.7 T-shape Valve (Optional) 1.8 Others PVC Fittings, Flexible Hose & PE Flexible RO Tube (depends on your needs) 2. Extend piping from the wall to the target location. Use Items 1.1 & 1.2 to connect from the wall, then extend the pipe using Items 1.3 & 1.4. 3. Dismantle the existing kitchen sink (if you want to make new kitchen top & kitchen cabinet) 4. Wait for your kitchen top / cabinet to be ready. There will be 2 holes reserved for you to continue working on plumbing. 5. Continue your plumbing work using Items 1.5, 1.6, 1.7, 1.8 until connection to Pre-Filter 6. From the Pre-Filter, connect the outlet to the kitchen tap using flexible hose and the necessary PVC fittings. Connect the sewage pipe to the other reserved hole. 7. By now, your kitchen tap is ready. 8. Next, install the kitchen top water filter. No need any tools or additional parts, just use the accessories provided. 9. Test your kitchen top water filter mode (Tap, Save, Filter) 10. Basically the DIY is done. If you notice, I reserved an outlet using Item 1.7. The left side outlet (Marked "1") is connected to Pre-Filter, but the right side outlet (Marked "2") was ended with end cap.In case if you want to bypass the pre-filter, just turn-off the valve on the left outlet (Marked "1") and connect the flexible hose (from kitchen tap) directly to the right (Marked "2"). This is to reserve for an alternative water supply route.
11. The outlet valve at the bottom of Pre-Filter is for backwash. Use it when you want to do backwashing. You will need to connect a PE flexible RO tube and channel the water to a drainage hole or directly to the kitchen sink during backwashing.


No comments:
Post a Comment